


.png)

What Are Kubernetes Components?
Kubernetes components are instrumental to facilitating the container orchestrator’s core functions, ranging from software and hardware components to worker node and control plane components. While Kubernetes components are pretty uniform across all deployments, organizations are able to configure what components are used.
K8s give developers and operators complete control over each component, empowering them to create always-available apps and make rolling updates without requiring downtime. And as their apps gain popularity, Kubernetes scales as configured so that every new user has an excellent experience.
Yet, because of these moving parts, Kubernetes has earned a reputation for having a steep learning curve and complex setup. While Kubernetes is certainly unique and will require learning new terms and concepts, it doesn’t have to be complex and out of reach. Keep reading to learn more about Kubernetes and how you can get started embracing it for your applications.
Kubernetes Architecture Components
To understand the individual components of Kubernetes, it is important to grasp the Kubernetes architecture components.

Main Architecture
At a glance, Kubernetes is comprised of clusters that are comprised of even smaller parts:
- Cluster: A cluster is a group of nodes combined to form a cohesive and powerful machine, sharing compute, network, and storage resources. Kubernetes works with an entire cluster, with nodes being automatically added or removed as necessary. Every cluster requires a master node, with the rest of the nodes in the cluster known as worker nodes.
- Control Plane: While not hardware itself, the control plane is responsible for managing all of the activities in a cluster, including scaling applications, rolling out updates, and scheduling.
- Node: Every single physical or virtual machine used by Kubernetes is considered a node. Nodes can be virtualized on a service like Google Cloud Platform or be a physical machine in a data center.
Each cluster will have a control plane and at least one worker node, with these parts working together to host the pods that are instrumental to Kubernetes operations. But what are pods?
Containers and Pods
Kubernetes is dedicated to orchestrating containers, with individual parts such as clusters and nodes working together to operate these workloads.
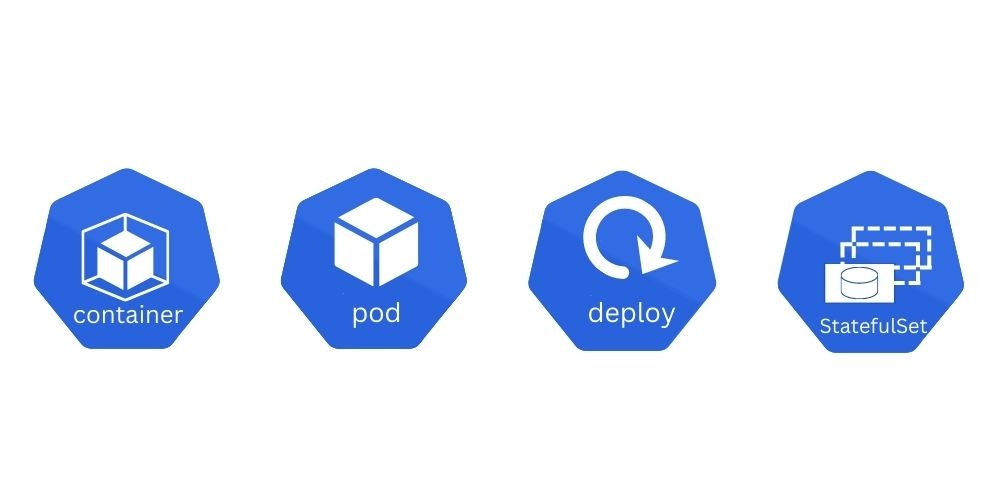
- Containers: Containers are at the center of K8s. While similar to a virtual machine (VM) in concept, there are substantial differences that make containers an improvement on the design. Like VMs, containers have individual file systems, CPU, memory, and other resources. However, unlike VMs, containers are decoupled from the underlying hardware and infrastructure, making them portable across cloud environments and operating systems.
- Pods: Containers don’t typically exist as a single entity. Instead, a container will be “tightly coupled” with other containers, known as a pod. Pods are managed and deployed as a singular unit.
- Deployments: A deployment is a method for dictating the state of Kubernetes pods. The deployments system uses a ‘desired state’ format for developers to describe how the deployment should look, then Kubernetes will follow the instructions to change a pod’s active state to the new desired state.
- StatefulSet: StatefulSet is a workload API object that is similar to Deployments but has an essential difference — it maintains a sticky identity for each pod. By doing so, developers can use StatefulSet for persistent storage, maintaining unique network identifiers, and ordered rollouts.
Network
Networking is a vital part of Kubernetes that makes the entire platform operate and become publicly available. There are a lot of terms in this category, but you can get started by understanding a few of the most important ones:
- Service: A Kubernetes Service is a REST object and allows developers to expose an application running on pods as a network service. Every pod is given a unique IP address, and a set of pods has a single DNS name, which is vital for load balancing.
- Load Balancer: The load balancing algorithms allows Kubernetes to allocate traffic and resources adequately to keep the application running and users happy. There are several different strategies and algorithms to explore for effective load balancing, but they all share the common goal of maximizing availability and scalability.
- Ingress: As an API object, Ingress manages external access to a cluster’s services, generally through HTTP. Ingress can also provide load balancing and SSL termination.
To learn all the detailed network terms used by Kubernetes, read the official documentation for more information. However, the above terms will do the job of simply getting started.
Storage
How does Kubernetes handle storage? Two essential terms demonstrate its approach:
- PersistentVolume: Given the flexible nature of containers, how can you reliably store data? PersistentVolume is an API that uses the given configuration details and creates a new resource in the cluster with an independent life cycle of the rest of the pod. This creates a piece of storage that will be available for as long as needed.
- PersistentVolumeClaims: A PersistentVolumeClaim is a request for storage that’s made by a user. These claims will require storage from the PersistentVolume allocations.
Configs
There are a few more terms you should know to help further understand how the entire platform is configured, including:
- Secret: As you might imagine, a Secret is an object with sensitive information, such as a token or password. Using the Secret object allows you to store information your apps require but will not be included in your application code. Instead, Secret objects can be accessed to obtain this information when necessary. Secrets are created independently of the pods that will use them.
- ConfigMaps: A ConfigMap is a specialized API object that allows you to create and store configurations for other objects to make use of. A common way to use ConfigMaps is to create reusable settings for usage by pods throughout the application.
Core Components of Kubernetes
Surprisingly, you won’t need to download and learn dozens of tools to get started with Kubernetes. Instead, you only need to learn a few:
- Kubernetes Command Line (kubectl): All of K8s core features are configured, deployed, and managed with kubectl. Kubectl and its components are how most developers manage Kubernetes.
- Minikube: While you can work on a cloud platform, minikube allows you to work on your local machine. Other options, such as kind, provide the same capability.
- Containerization Engine: Container engines run the individual containers, making them an essential Kubernetes component. Kubernetes uses the Docker engine by default and won’t need to be installed separately. Some advanced uses require understanding the Container Runtime Interface, but learning how to use kubectl and its components will suffice for most users.
However, to fully leverage Kubernetes for the powerful tool that it is, users should have an understanding of the components that make up the integral gears of Kubernetes.
Control Plane and Node Components
Being the mastermind of Kubernetes, the control plane is comprised of:
- Kube-apiserver: Server responsible for managing container lifecycles
- Kube scheduler: Part responsible for scheduling pods
- Kube controller manager: Part tasked with running and managing controller processes
- Etcd: Kubernetes’ data storage responsible for storing API server data
- Cloud-controller-manager: An optional part that integrates with cloud providers
Doing the heavy lifting, nodes are comprised of parts built for operation:
- Kubelet: Responsible for ensuring that containers are running inside a pod
- Kube-proxy (optional): Network proxy that runs nodes on clusters
- Container Runtime: Component that optimizes container operations by executing and building containers within a Kubernetes environment
These components are integral to the successful operations of Kubernetes.
What is Kubernetes?
Kubernetes is a portable open-source container orchestration tool that manages and containerizes workloads or services. The platform's thriving open source community provides frequent updates and comprehensive support.
First developed by Google, it was released in 2014 as an open-source application and is now managed by the Cloud Native Computing Foundation. Kubernetes is the result of Google’s 15 years of experience creating and optimizing production workloads at scale, a focus that helped it become the world’s search engine.
But why has Kubernetes gained so much popularity? Some of the powerful features of the platform that have propelled its rapid adoption include:

- Load balancing: Too much traffic to an app can cause it to crash, so Kubernetes can be configured with automatic load balancing to spread traffic and resources throughout its pods. New containers can be replicated on-demand so that sudden spikes in usage don’t crash the app but instead accommodate everyone.
- Self-healing: K8s containers that fail will be automatically restarted, replaced, or killed. Failing containers won’t be made publicly available until they’ve self-healed or been replaced with a healthy container.
- Storage orchestration: How do you prefer to store data? Regardless of your answer, Kubernetes can accommodate it by allowing you to mount local storage, cloud storage, or a hybrid cloud option.
- Automated rollouts (or rollbacks): Tell Kubernetes the desired state for your deployed containers, such as including your latest app updates, and it can change the actual state to the new state at a controlled rate. This feature allows you to deploy updates or rollbacks throughout the infrastructure without any downtime.
- Secure secret management: Kubernetes can be used to store sensitive information, including OAuth tokens, SSH keys, and passwords, without requiring you to rebuild containers or exposing your secrets in the application code.
How to Get Started with Kubernetes
Now you’re ready to get started using Kubernetes to create always-available applications that automatically scale as necessary.
Imagine you want to put a simple Node.JS “Hello World” application on the Internet. Without Kubernetes, you’d make this application publicly available with a server instance (such as EC2 on AWS), install web servers, and configure the application accordingly.
But instead of going the old route, we’ll be looking at how we can achieve the same goal of a publicly available application with Kubernetes. Additionally, the official Kubernetes documentation provides an interactive tutorial and more details on each step, which we’ll link to if you wish to learn more and try it out yourself.
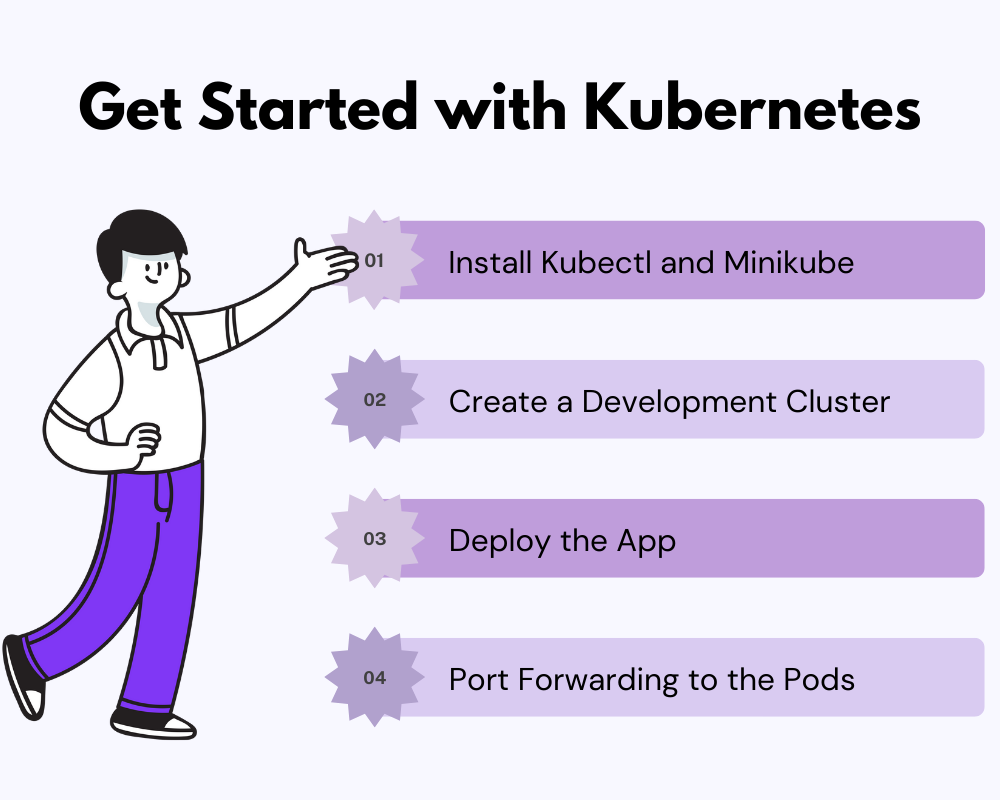
1. Install Kubectl and Minikube
Kubectl is a command-line tool for managing Kubernetes, while Minikube allows you to create localized containers. Kubectl can be installed on Linux, macOS, or Windows with a simple curl command. Check out the official install guides for up-to-date instructions for each OS.
Minikube was designed to mimic the same conditions as working in a cloud environment, so practicing on your machine will be essentially the same as working on the cloud. However, you won’t have to worry about consuming cloud resources or interfering with a live application.
Just like kubectl, minikube runs on Linux, macOS, or Windows. You can also use a curl command for Linux and macOS. Visit the official documentation for current instructions and other installation methods.
2. Create a Development Cluster
You can create a development cluster by using minikube. The main difference between a development cluster and a standard cluster is that a dev cluster will exist on your local machine.
Begin by starting minikube in your terminal:
minikube start
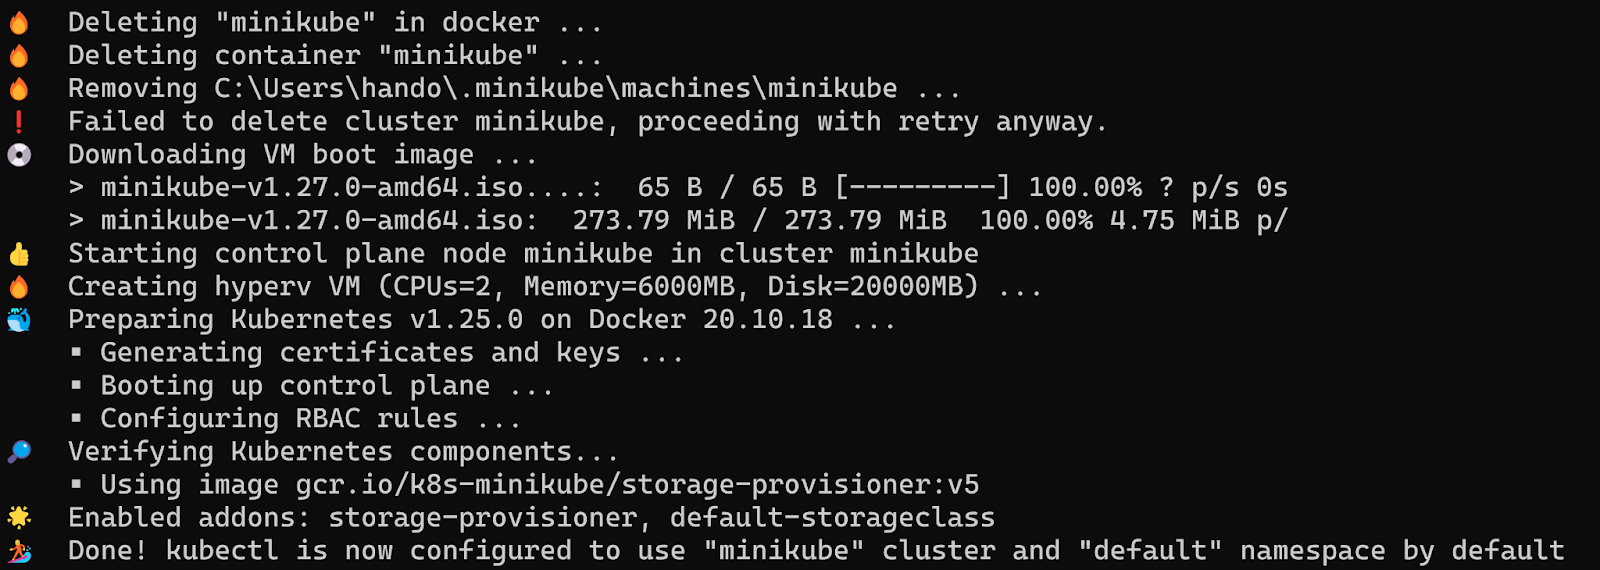
Next, make sure kubectl is working and your cluster is operational with a simple command to view the cluster information:
kubectl cluster-info

You can also see all available nodes by running:
kubectl get nodes
View more information and the interactive minikube tutorial at the Kubernetes Documentation.
3. Deploy the App
You can deploy a containerized application to your new cluster using Docker's tutorial repository.
In the same terminal, use the kubectl run command to create a new container using Docker’s repository:
kubectl run kubernetes-bootcamp \
--image=docker.io/jocatalin/kubernetes-bootcamp:v1 --port=8080
What is this?
Short explanation — it’s a simple NodeJS web server that serves simple text. The full source code is here:
https://github.com/jocatalin/bootcamp/blob/gh-pages/code/docker/v1/server.js
This command will create a new deployment named ‘kubernetes-bootcamp’ and override the default port to make it 8080.
To view your deployed app, you can now run:
kubectl get pods
You’ll see all of your pods and a table indicating the desired state, current state, up-to-date, and available. In a real environment with a live app, you would see a long list with varying numbers of ready containers.
View more information and the interactive kubectl deployment tutorial at the Kubernetes Documentation.
4. Port Forwarding to The Pods
Remember how a service makes apps available to external network connections? It’s time to make a service using a port-forward command to test and expose the pods that we deployed. Simply run:
kubectl port-forward pods/kubernetes-bootcamp 8080:8080

Open a new terminal window and run a curl command to your pod in action:
curl http://localhost:8080
You’ll see the output of the pods that displays the information of the cluster you deployed.
View more information and the interactive Service tutorial at the Kubernetes Documentation. You can also go further and learn how to scale your application.
Lyrid Simplifies Deploying and Managing Kubernetes
Now you know the right terms, tools, and technologies that make Kubernetes powerful for all applications and services. We went over a simple tutorial, but the process can become increasingly complex as you start making complex, live applications.
The beauty of Kubernetes is the platform is standardized and powerful to run on any infrastructure and supports many complex use-cases.
Lyrid makes the entire process significantly more straightforward and more manageable. Let’s dissect the above tutorial, but this time, through Lyrid’s multicloud Kubernetes platform:
- Simple Deployment: Run your container directly within the Pod interface.
- Simple Deployment with External Access: Navigate to LoadBalancer > Service > Pod and configure as needed.
- Add a Functioning Load Balancer: Navigate to LoadBalancer > Ingress > Service > Deployment > Pods (Multiple) and configure are needed.
You can see how you don’t have to install anything or use a terminal. With a few steps within our platform, you can quickly deploy a containerized application, make it publicly available, and even configure an active load balancer.
Ready to discover how Lyrid can help you get started with Kubernetes without the headache? Deploy for free or request a demo from our Kubernetes experts today.
Interested in learning more about Kubernetes? Check out our blogs!
About Lyrid
Lyrid is a multi-cloud solution which makes cloud native developments automated and affordable. With Lyrid, development teams can innovate affordably, increase cloud vendor flexibility and test new ideas without disrupting existing processes.


99 South Almaden Blvd. Suite 600
San Jose, CA
95113

Jl. Pluit Indah 168B-G, Pluit Penjaringan,
Jakarta Utara, DKI Jakarta
14450

Rhapta Road, Westlands,
Nairobi
00800


99 South Almaden Blvd. Suite 600
San Jose, California
95113
Jl. Pluit Indah 168B-G, Pluit Penjaringan,
Jakarta Utara, DKI Jakarta
14450
Watermark Business Park, Lagoon Court,
Ndege Road,
Karen, Nairobi
00509